Generalities
There are many ways to connect your “on Premises” Data Center workloads with Microsoft Azure. I own the full meraki suite at home and have enjoyed it for the past three years. It provides all the features I need. I also have some workloads in Microsoft Azure and wanted to access them using a private and encrypted network instead of accessing them using their public IP. Meraki have the possibility to deploy a vMX 100 in Microsoft Azure. You can deploy a vMX100 either in Azure or in AWS and it will be part of your full mesh VPN as any other MX device that you own.
It can support up to 500 Mbps of VPN throughput which can be sufficient for a lot of organizations. From a licensing standpoint, you just need a Meraki License : LIC-VMX100-1YR (1 Year), LIC-VMX100-3YR (3 Years), LIC-VMX100-5YR (5 years). Microsoft will charge you monthly for the VM application.
From a design standpoint, the traditionnal Meraki MX appliances can be configured either in VPN concentrator or in NAT mode. The NAT mode concentrator has 2 interfaces (upstream and downstream) and performs Network Address Translation as you would do with a traditionnal firewall. In the concentrator mode the MX has a single interface connection to the upstream network. This mode is the only supported mode for the vMX100 in Microsoft Azure
Limitations
When you deploy the vMX 100 in your Azure and Meraki infrastructure for the first time, it works pretty well and the vMX 100 is able to fetch its configuration pretty quickly. If you delete all the objects and start from scratch, this will trigger a bug that is being identified by Meraki. Although I don’t have the technical details, the Meraki TAC will manually apply a fix that will trigger a synchronisation between the Meraki cloud and the vMX 100 in Microsoft Azure.
Logical Diagram
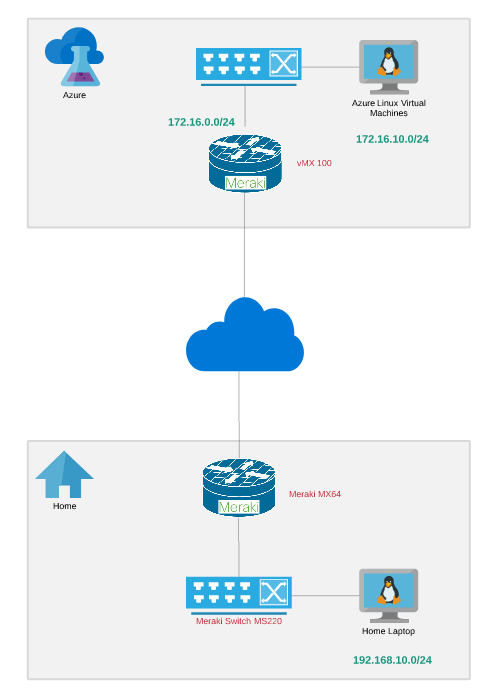
The below diagram is not 100% accurate based on the fact that the vMX100 supports only the one arm VPN concentrator mode. From a logical standpoint it represents a general good idea of what we are trying to achieve here. The Home internal network would use 192.168.10.0/24, the servers in Azure would use 172.16.10.0/24 and the vMX100 would use 172.16.0.0/24 with a single interface both for the downstream and upstream traffic. We will see how can we interconnect the Azure Linux virtual machines with the Meraki vMX 100 single arm VPN concentrator in details.
Initial Setup – Meraki
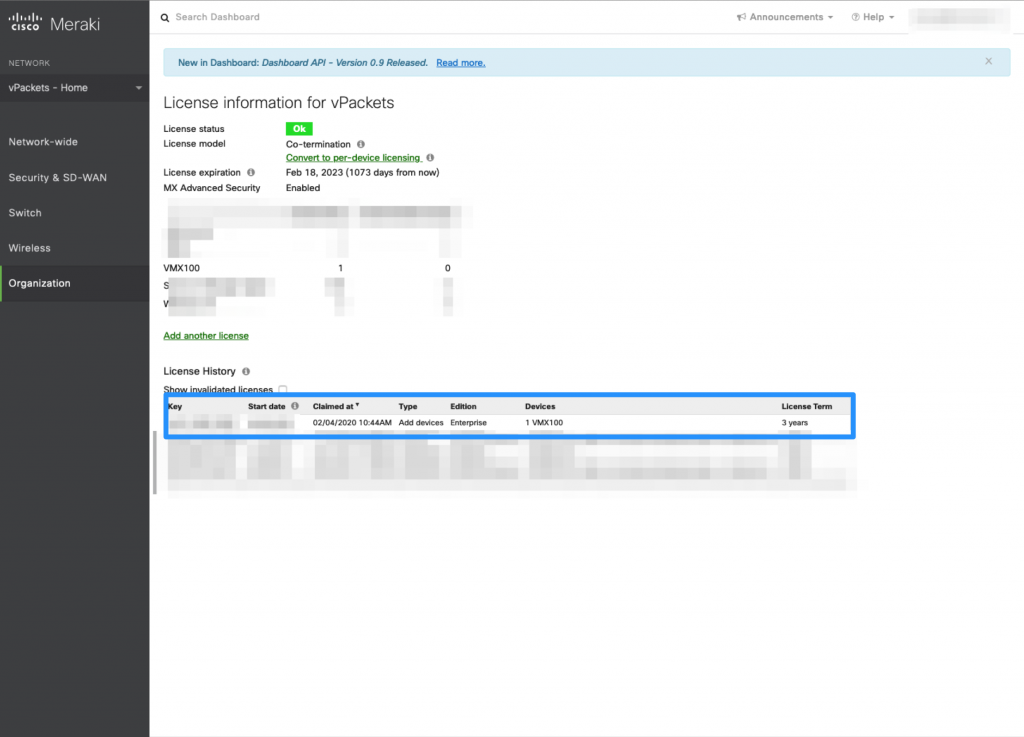
Initially, you would need to install the vMX100 license received from Cisco to the Meraki Dashboard.
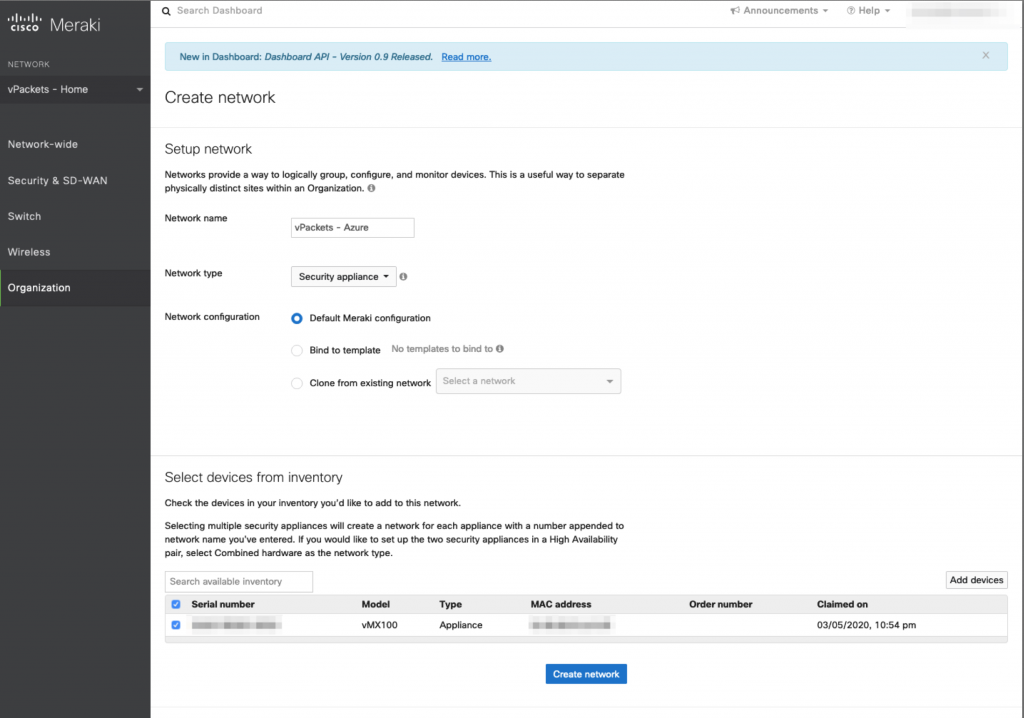
When the vMX100 license is installed, we can claim that device. We will do that in a new network. It is important that the network type is setup as “Security appliance” with a default configuration.
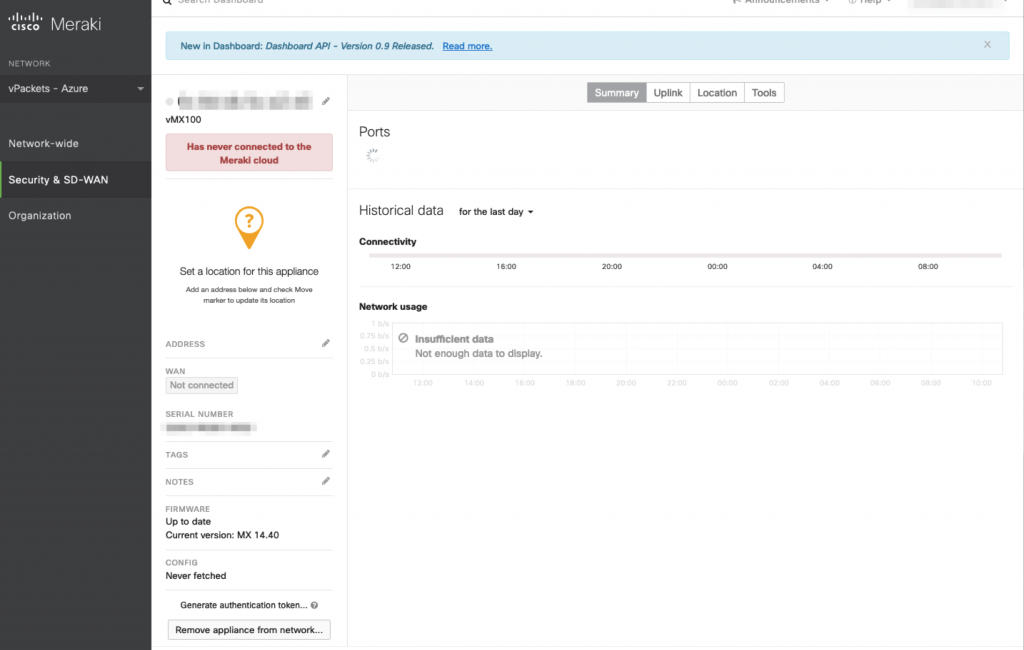
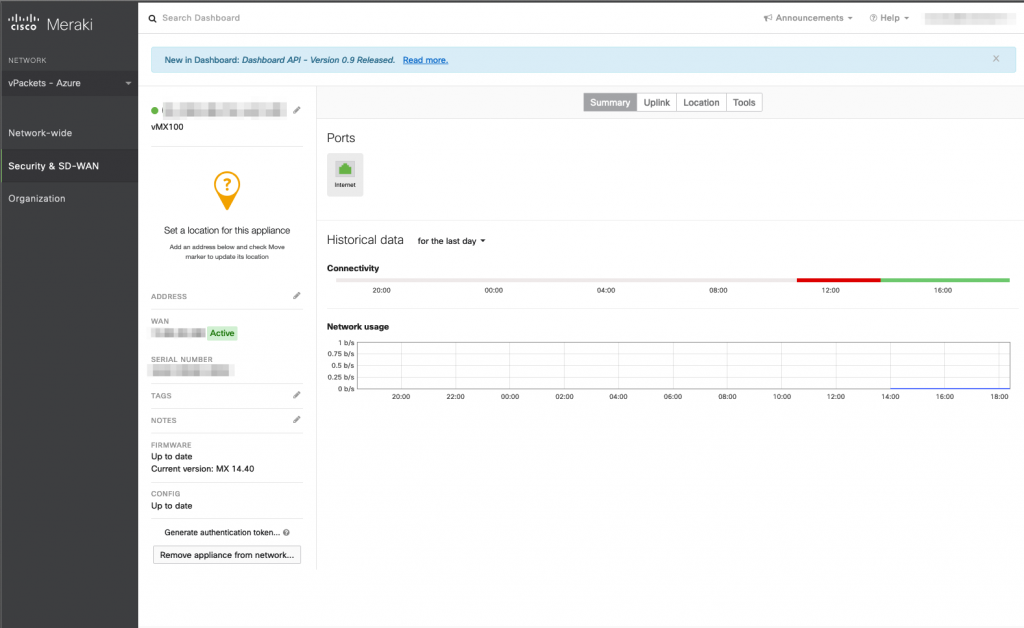
We can now see that the appliance is ready in the Meraki Dashboard and that it will come with a basic configuration. It is now time to deploy the vMX in Azure.
Initial Setup – Microsoft Azure
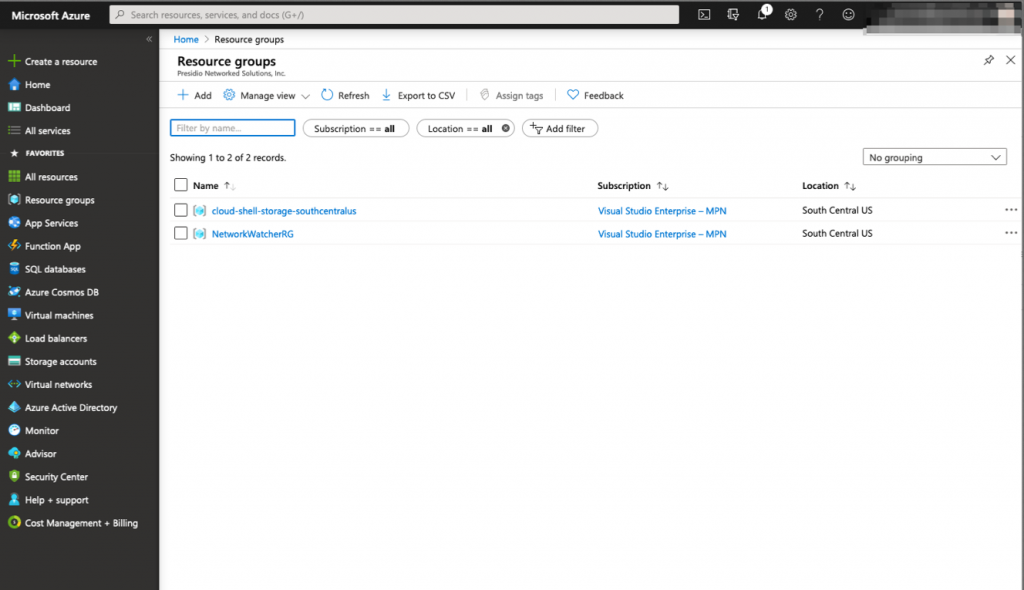
As you can see in the screenshot below, our Azure infrastructure is empty and we will configure it so that it can host the vMX100 and some servers.
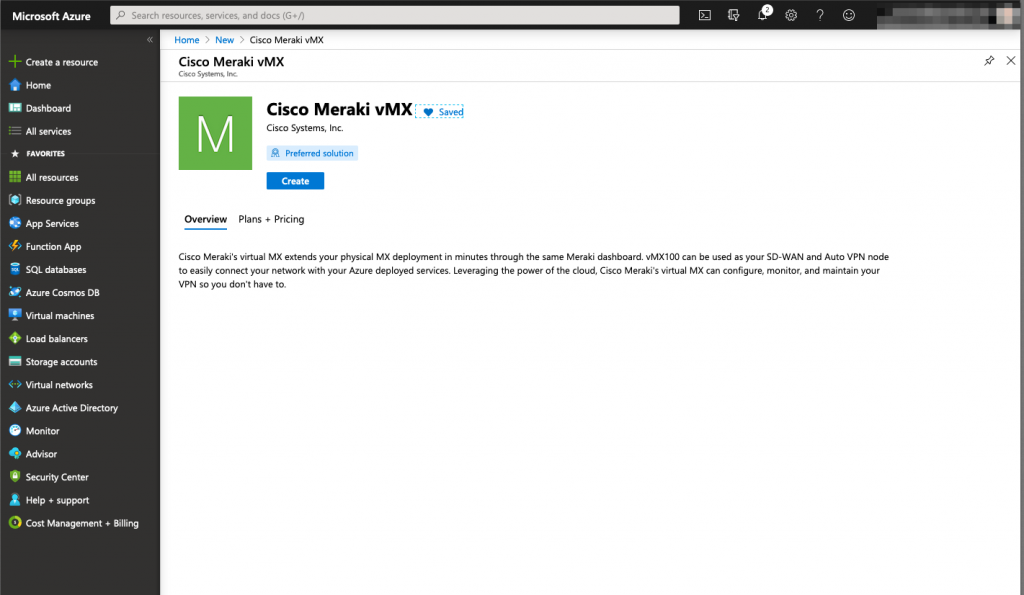
The Cisco Meraki vMX100 is available publicly on the Azure public catalogs as a managed application. It means that when you deploy the vMX100, a dedicated resource group will be created specifically for that service. That resource group will host every crucial component of the solution (Virtual Machine – Storage – Networking)
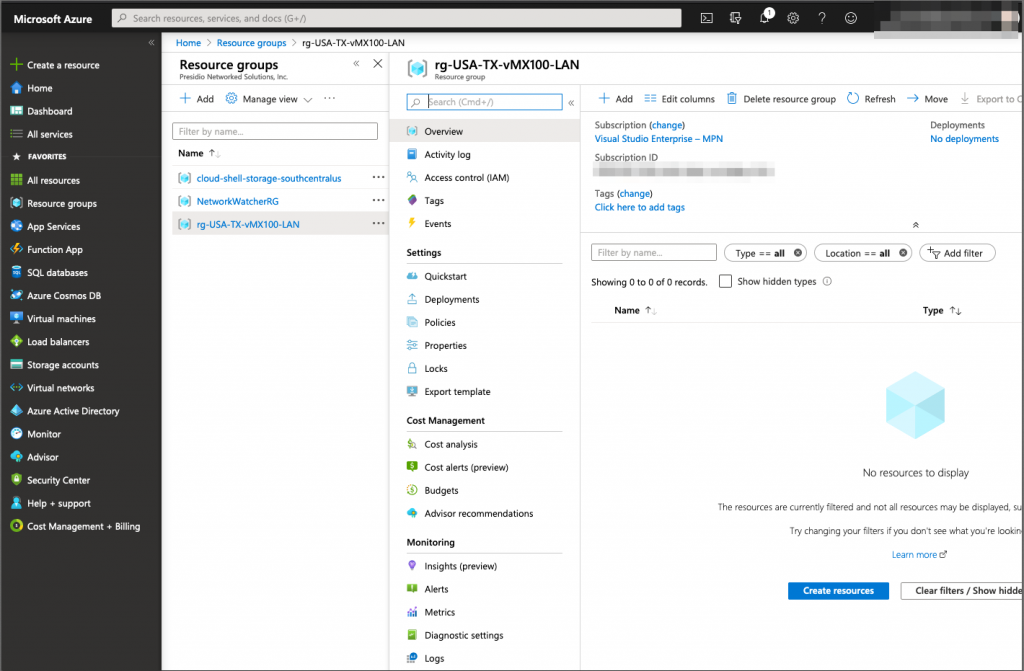
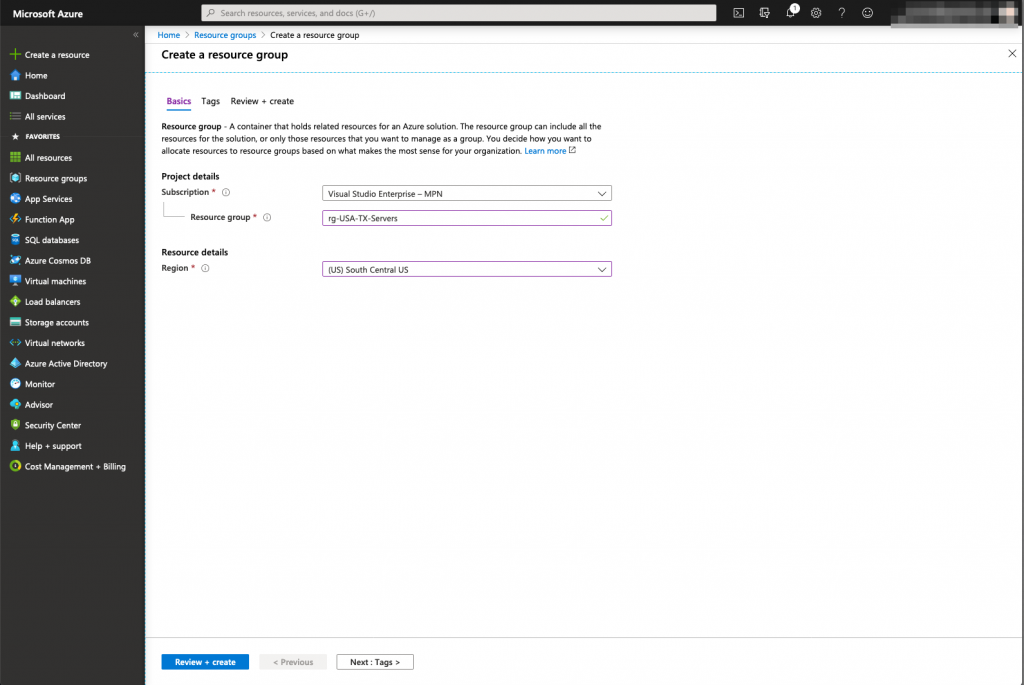
First we will create a dedicated resource group and virtual network for the vMX Network Interface (172.16.0.0/24)

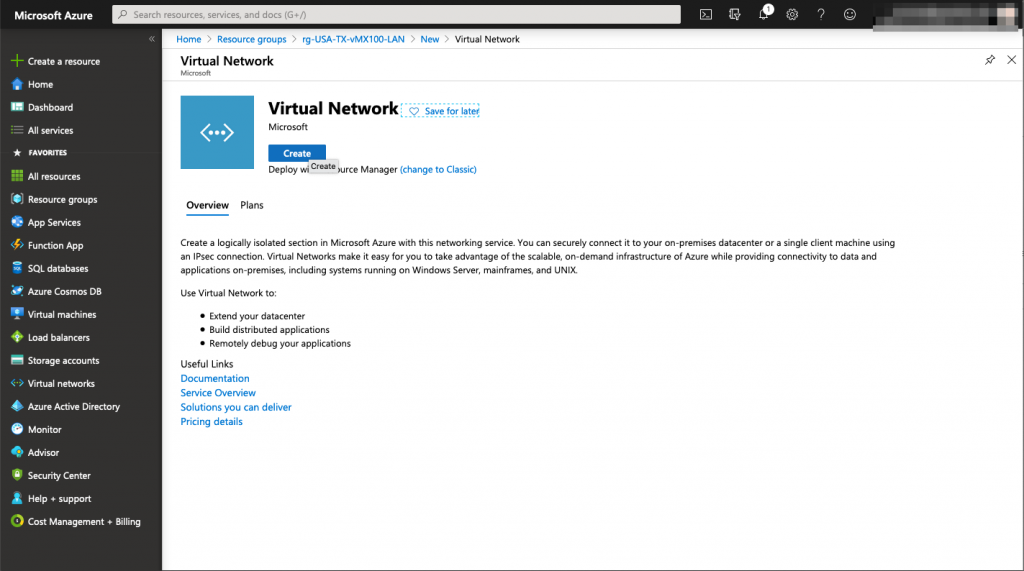
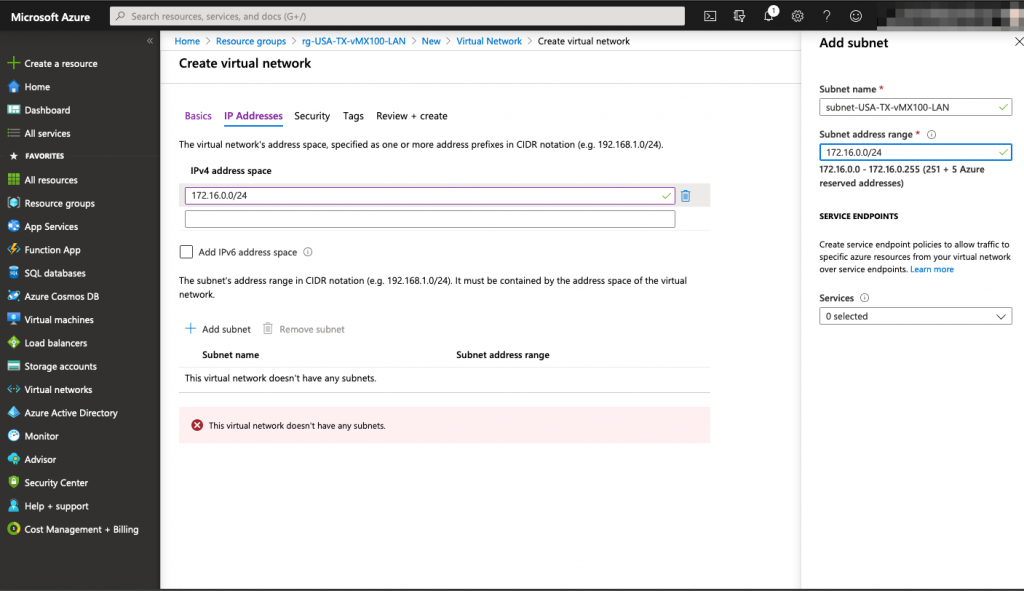
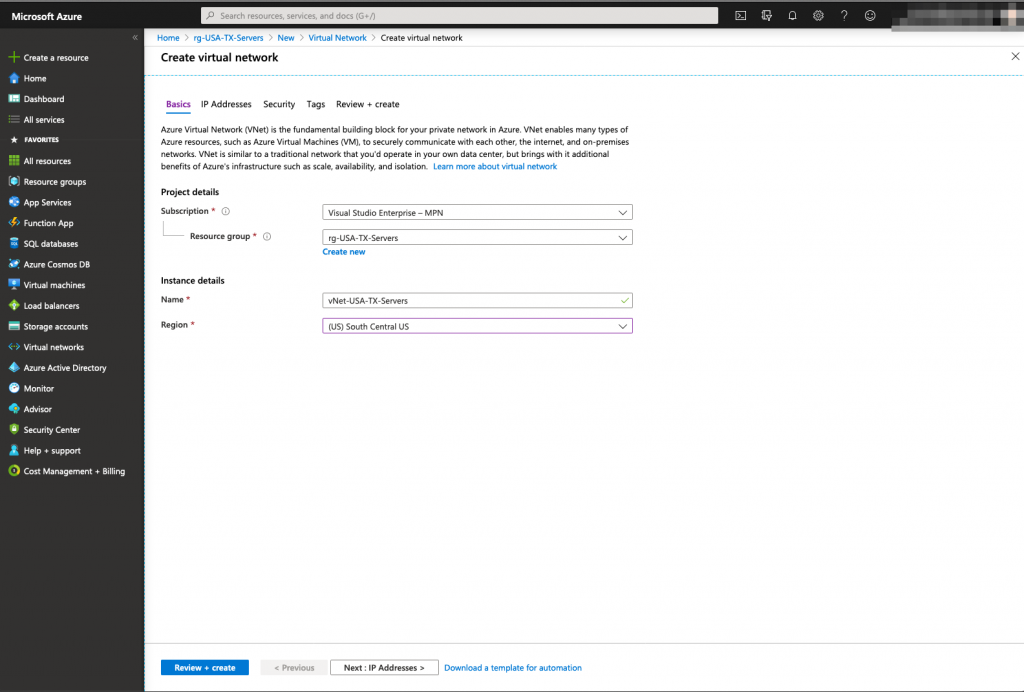
Once the resource group for the vMX interface is created, we need to create a Virtual Network (vNET) for it.
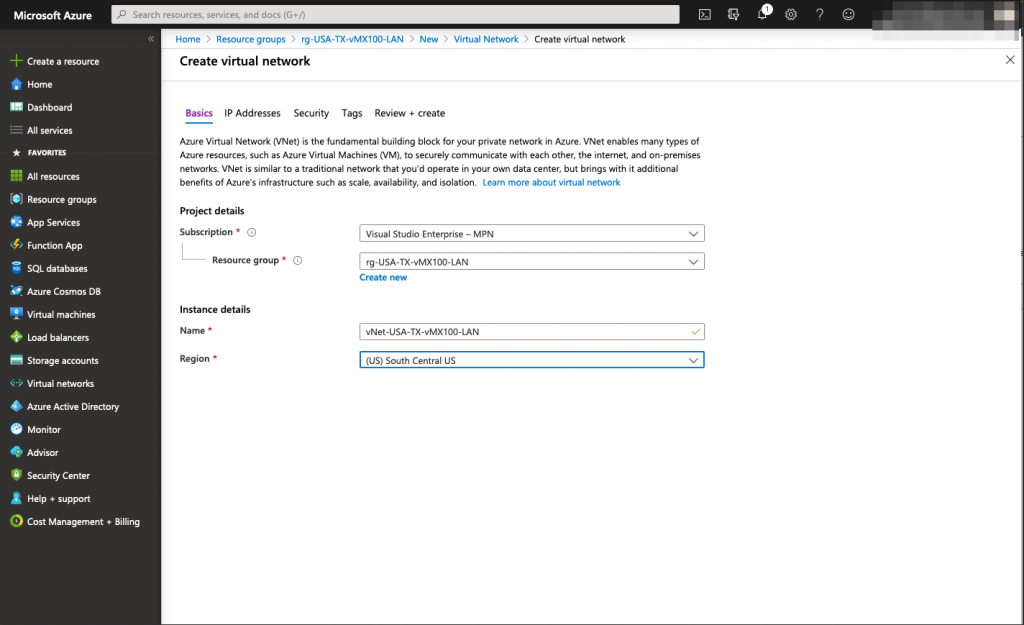
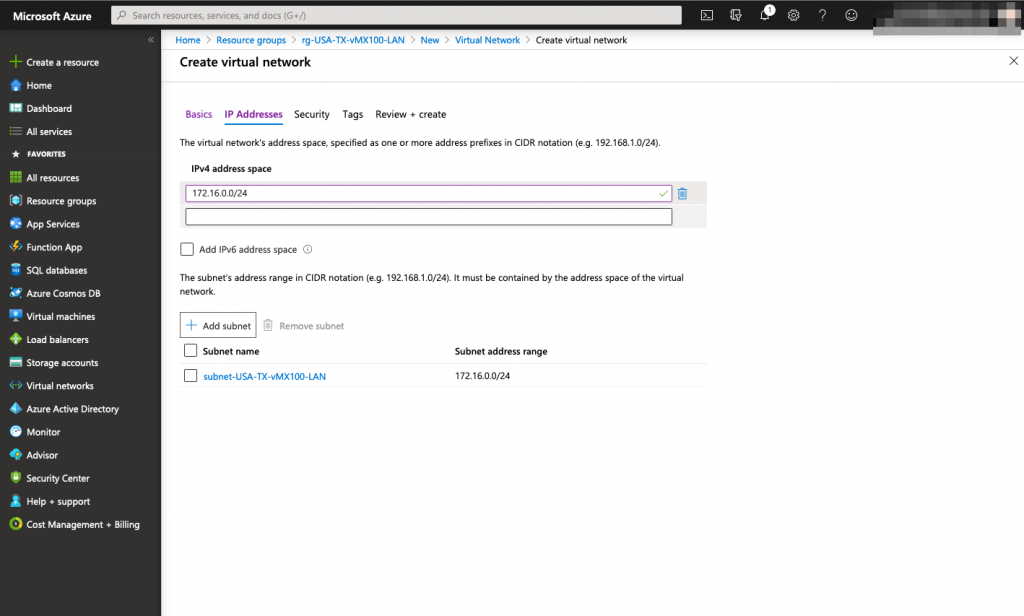
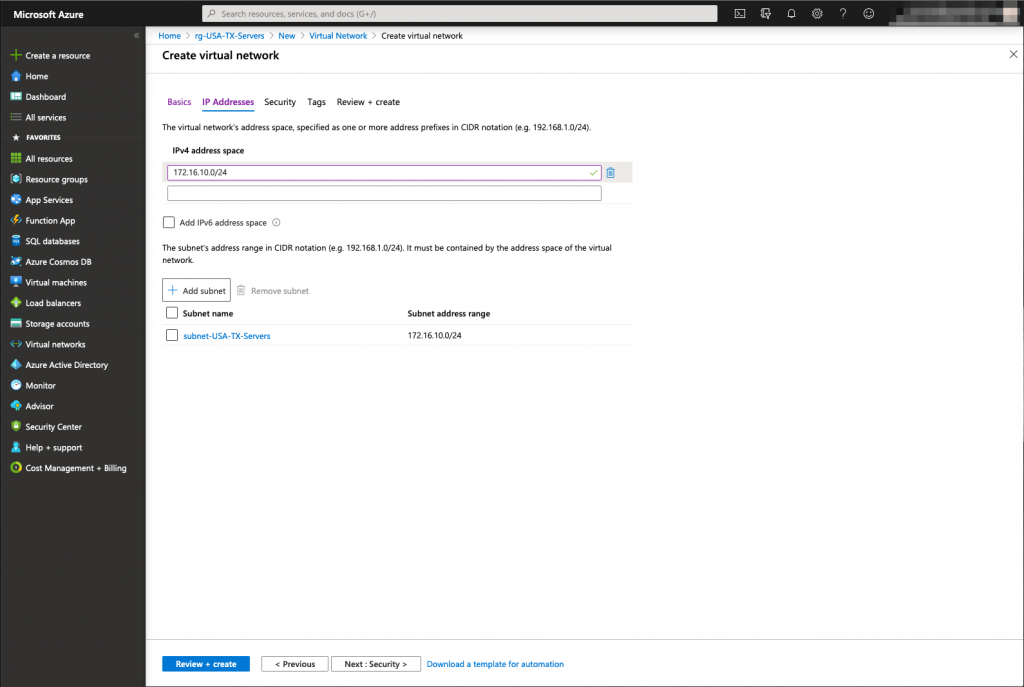
In this step, make sure you specify the right subnet for your Meraki vMX interface, it will be assigned automatically to the vMX when it will be deployed. In our example, the Meraki interface will use an IP address in the 172.16.0.0/24 range.
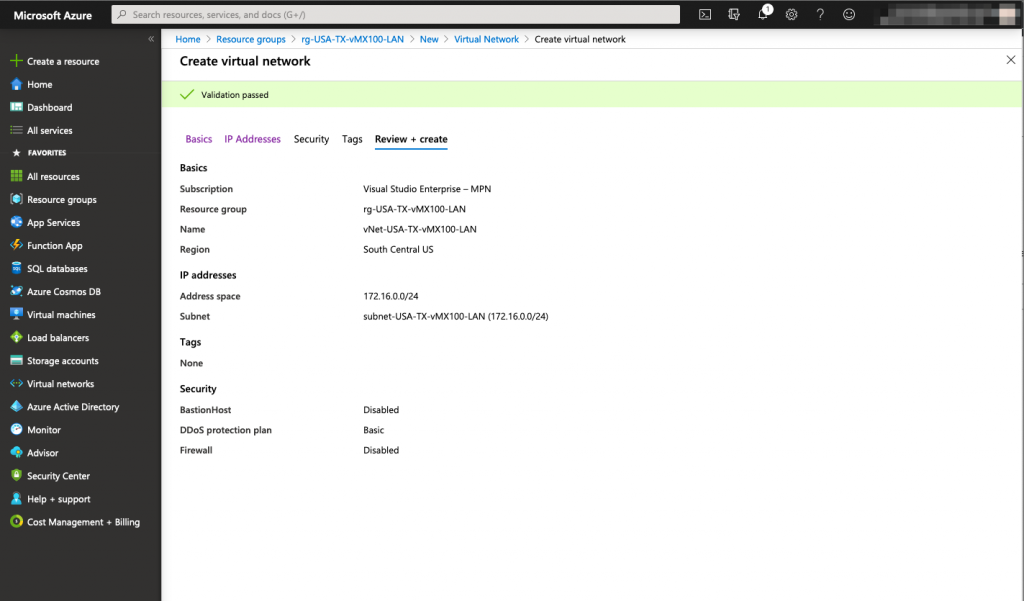
When the resource group and virtual network are created, we are ready to install our vMX 100 appliance in Microsoft azure.
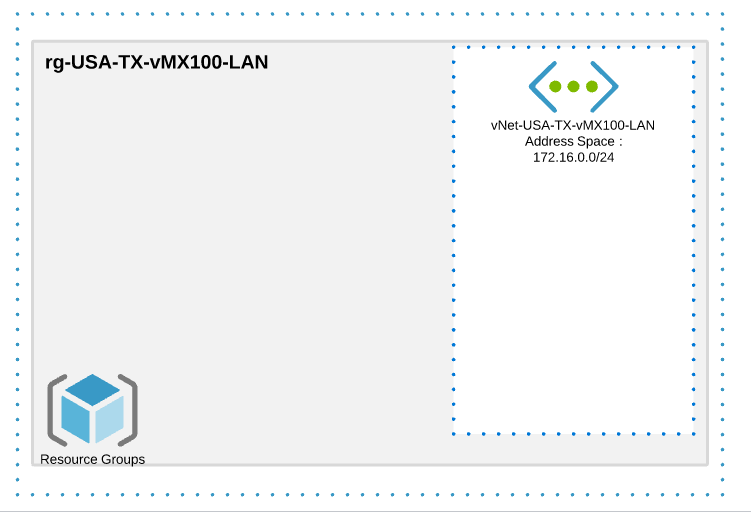
This is what we have created so far.
vMX100 deployment in Microsoft Azure
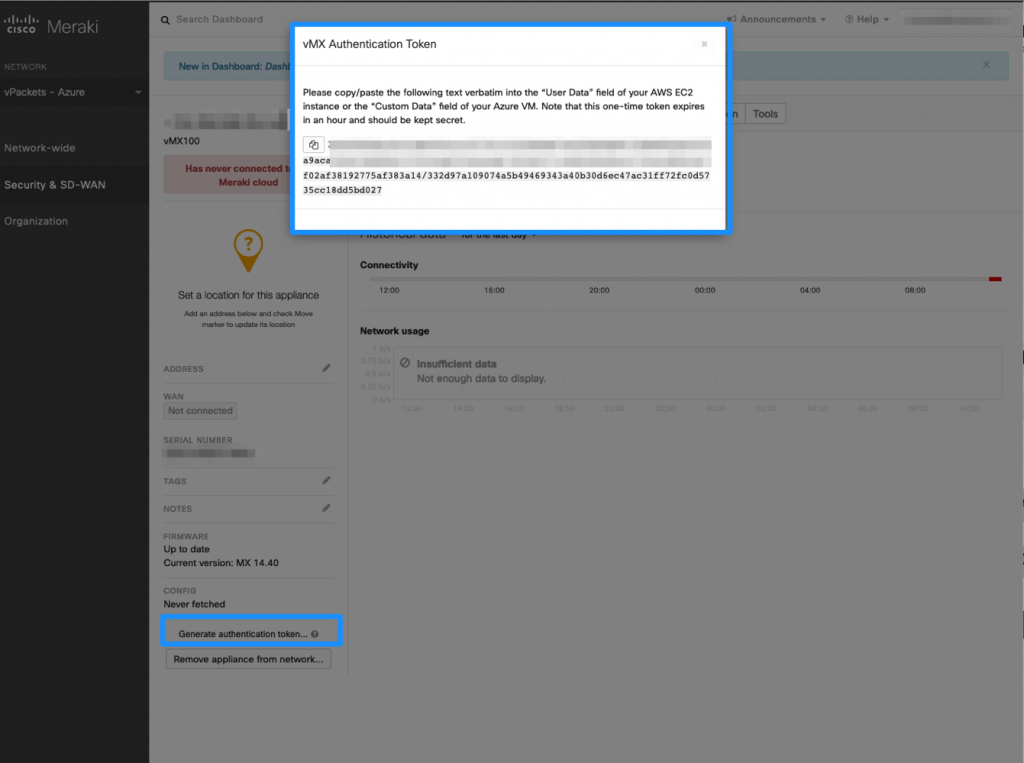
We are now ready to deploy our vMX 100 in Microsoft Azure as a managed application. A token must be generated from the Meraki dashboard in order to identify your tenant when you deploy the vMX 100. When you generate the vMX100 token, you have 1 hour to deploy the virtual machine in Azure or the token will no longer be valid.
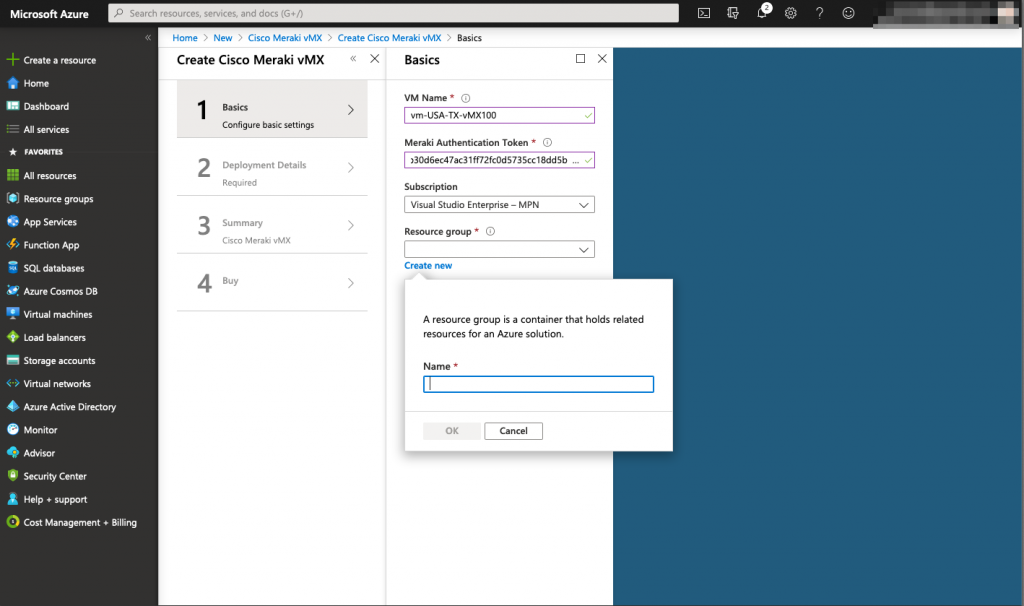
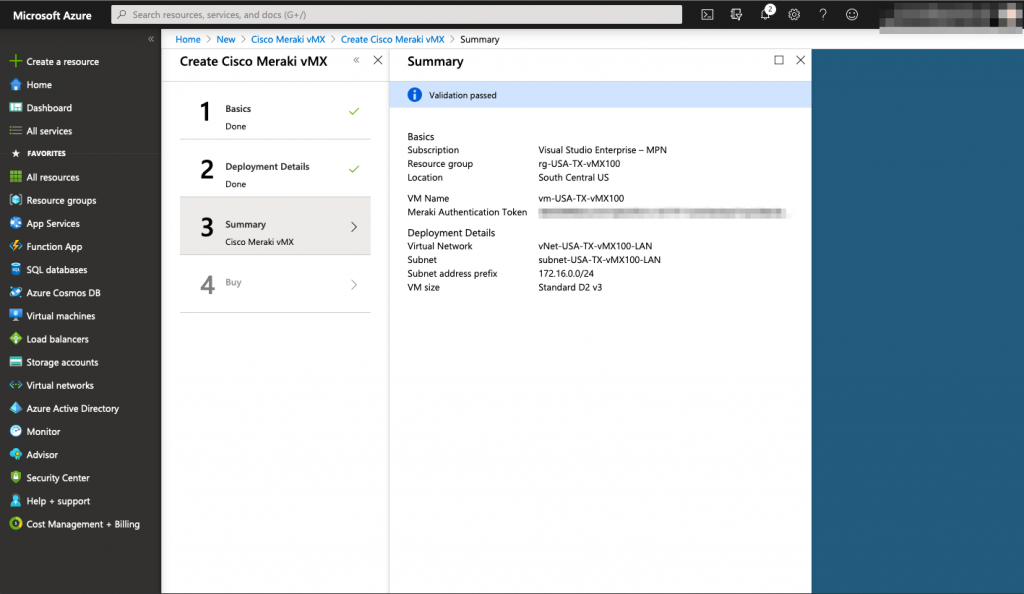
When it comes to configuring the basic settings of the vMX100, you will need to enter the Meraki Token that has been generated previously (reminder: This token has a lifetime of 1 hour). the resource group needed for the vMX 100 needs to be NEW and empty, you cannot reuse the previously created resource group for the Meraki interface. The reason behind is that vMX100 will be a managed applications and require its own resource group.

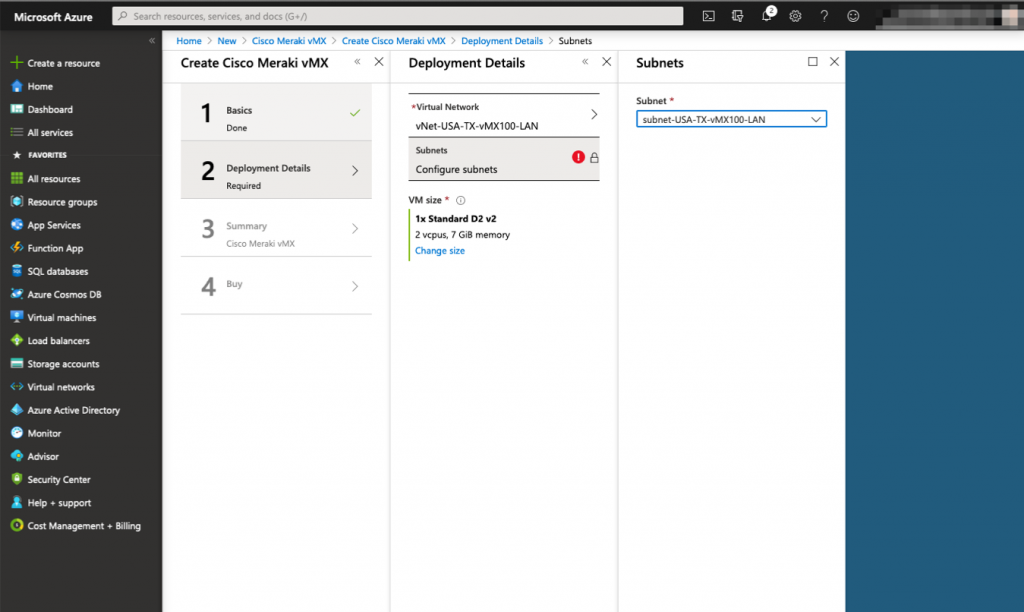
After that, you need to map the right vNet and subnet for the virtual machines. Here, you will reuse the previously created objects:
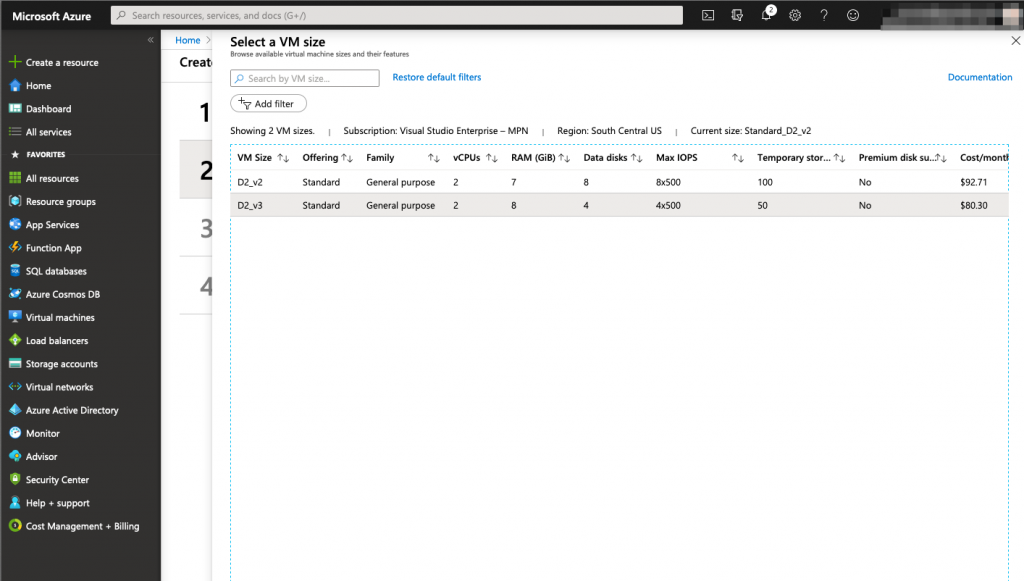
Next, you specify the size of the virtual machine you need. Meraki doesn’t specify if there is a different performance specifcations for each size so I went with the cheapest.
Once everything is setup, finish the process by buying the vMX100 subscription.
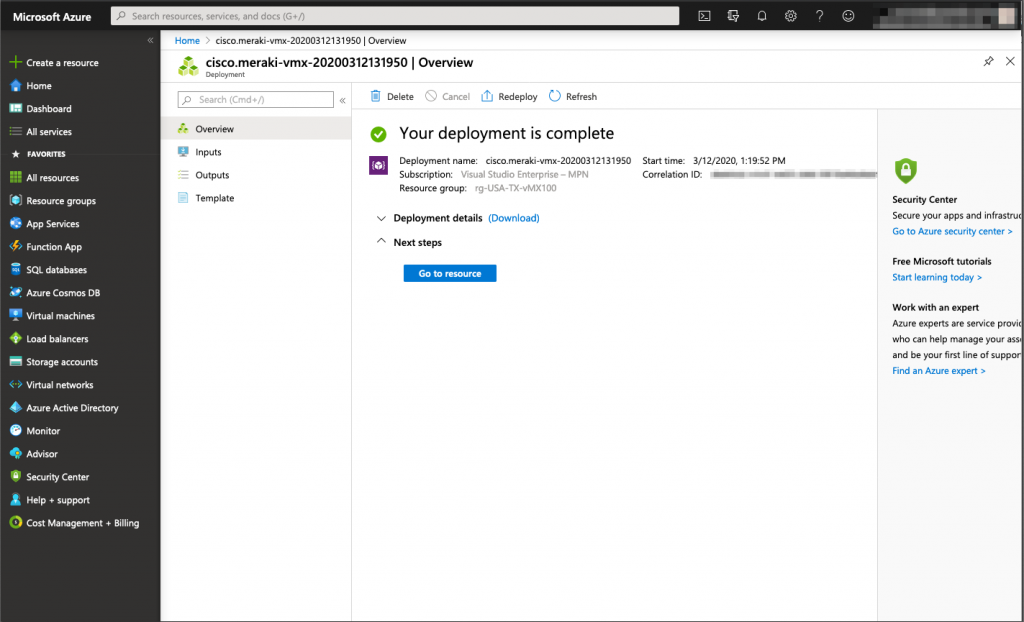
Wait for the virtual machine deployment completion and check in the meraki dashboard if the vMX100 in Azure has successfully fectched its configuration via the Meraki dashboard.
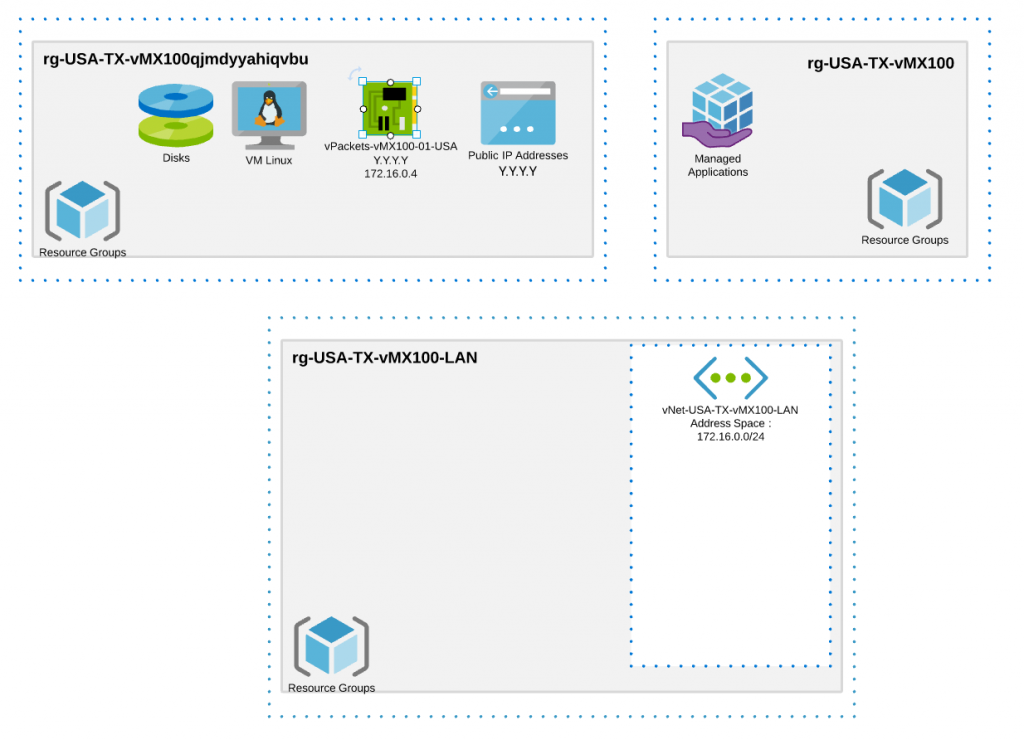
Up to this point, this is what has been created in Microsoft Azure.
Let’s verify in the Meraki Dashboard if the vMX 100 is online and able to fetch its configuration.
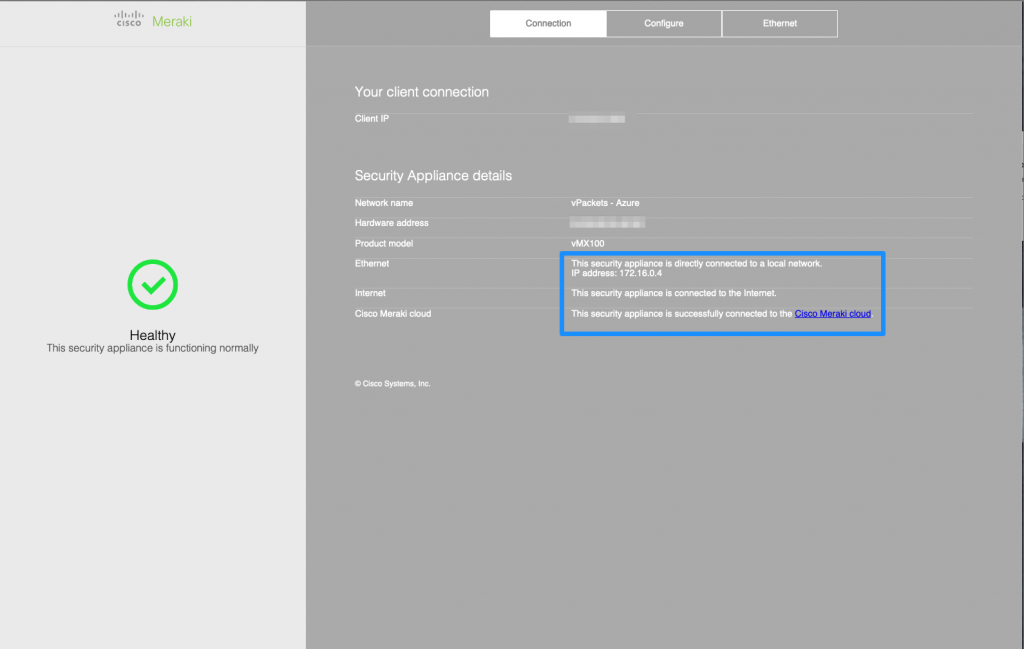
If you browse to the public IP of the vMX100, you will be able to see if it’s healthy and download some logs if needed (the serial number of the appliance is the login credential, there is no password).
VPN Configuration
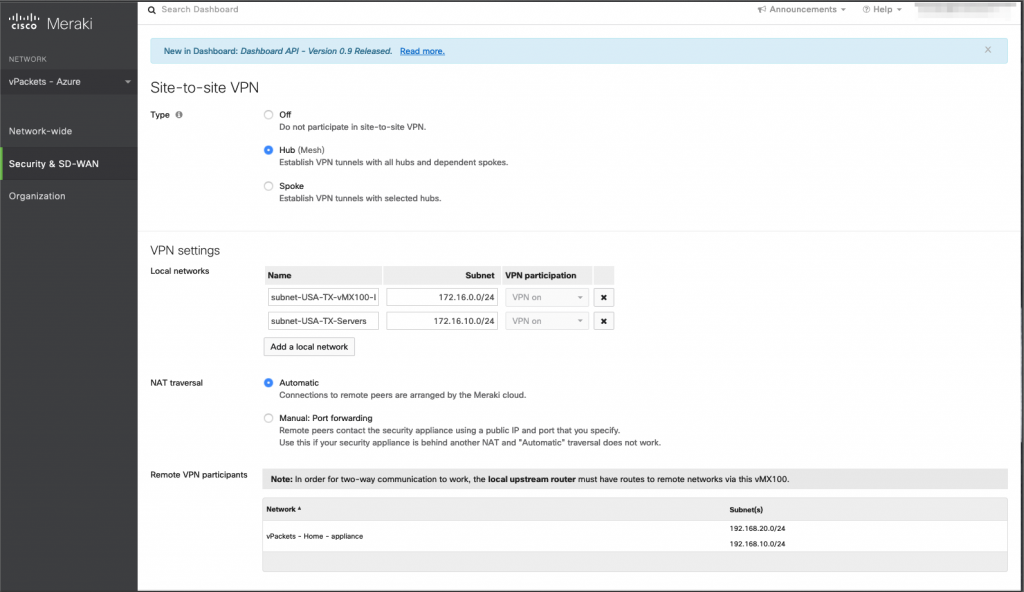
We can now start configuring the actual VPN and deploy some virtual machines. Make sure that both the vMX100 and the other Meraki Security Appliances (MX) are part of the VPN and are configured as hubs.
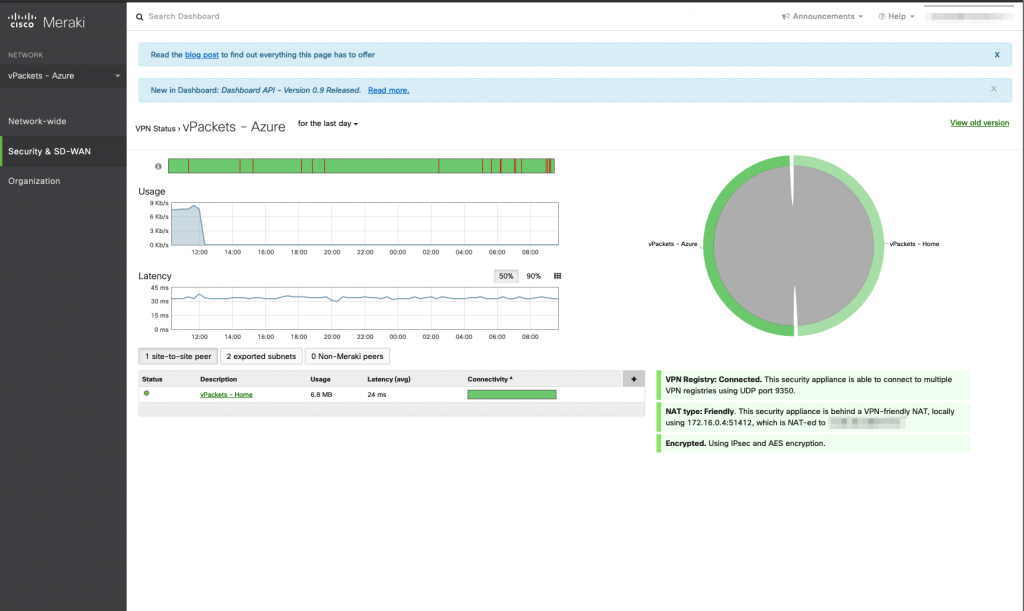
We can check the VPN status in the meraki dashboard.
Now that the VPN is up we can verify by pinging the vMX100 interface

Virtual machine deployment
It is now time to deploy some virtual machines in Azure and create the peering between them and the Meraki vMX100.
In order to do that, we need to deploy a resource group and a virtual network. These 2 objects will be used by the linux virtual machine that will be hosted in our Microsoft Azure instance. The subnet used inside the vNet will be 172.16.10.0/24
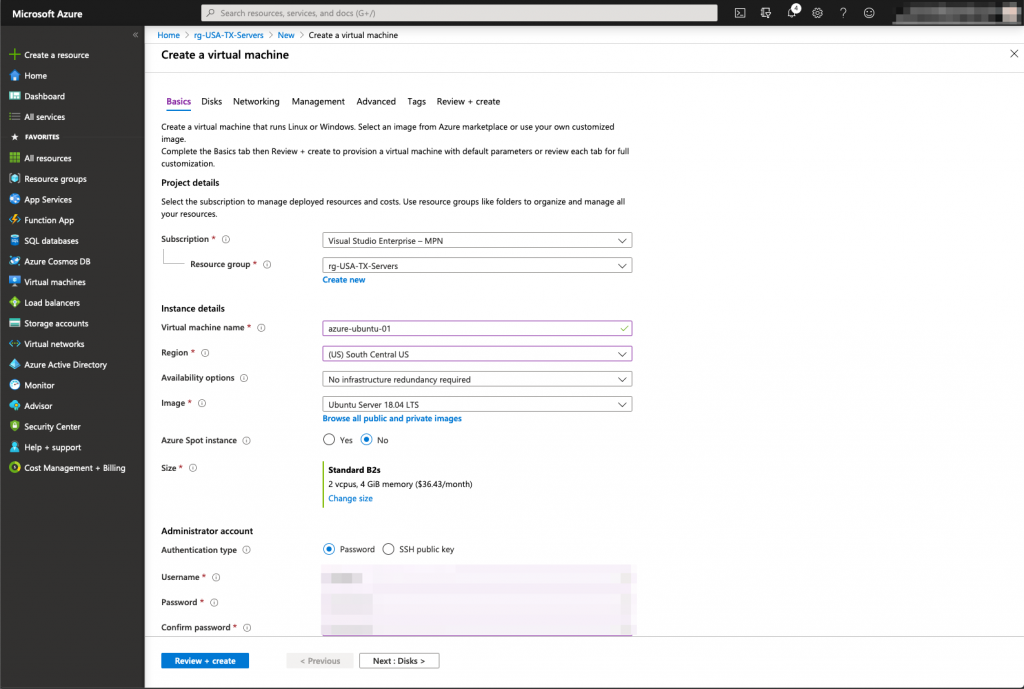
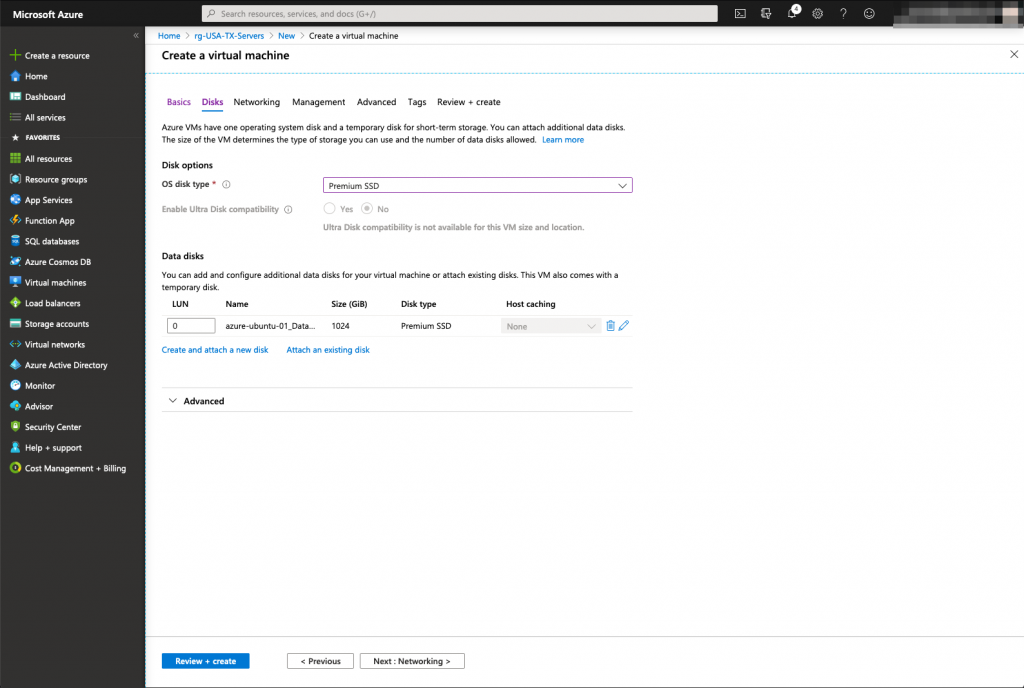
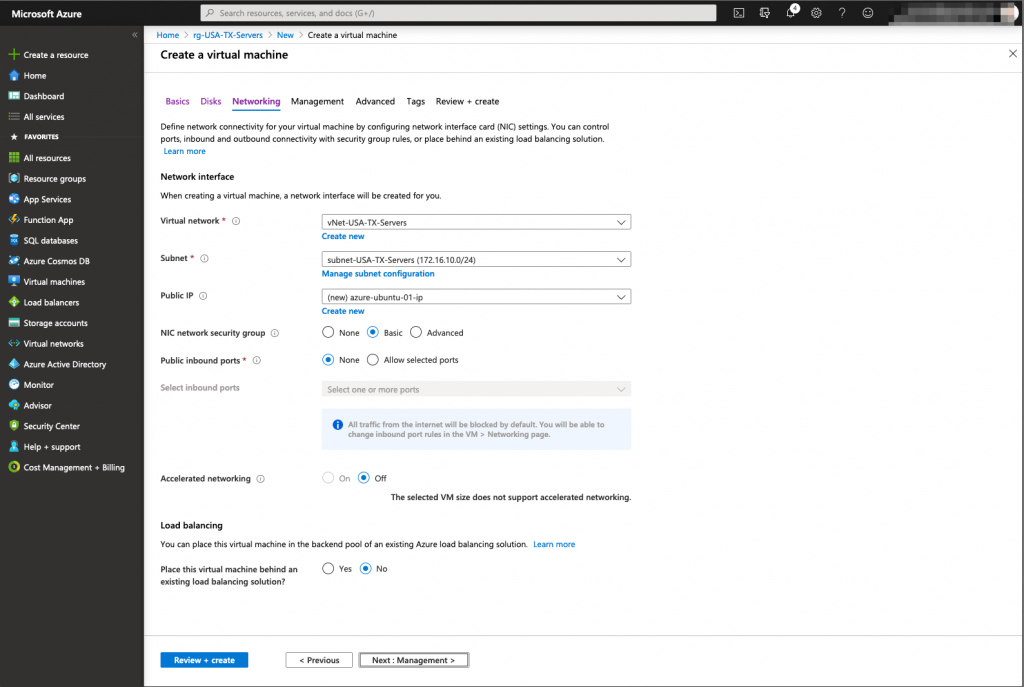
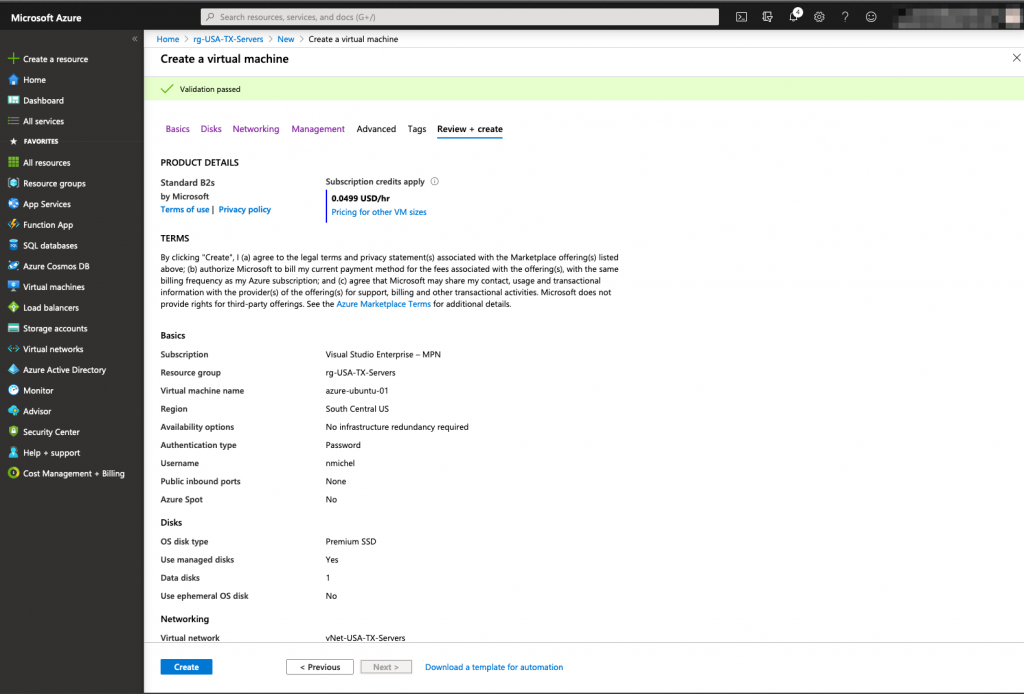
Now that we have the underlying infrastructure ready for the servers, we can deploy the virtual machines:
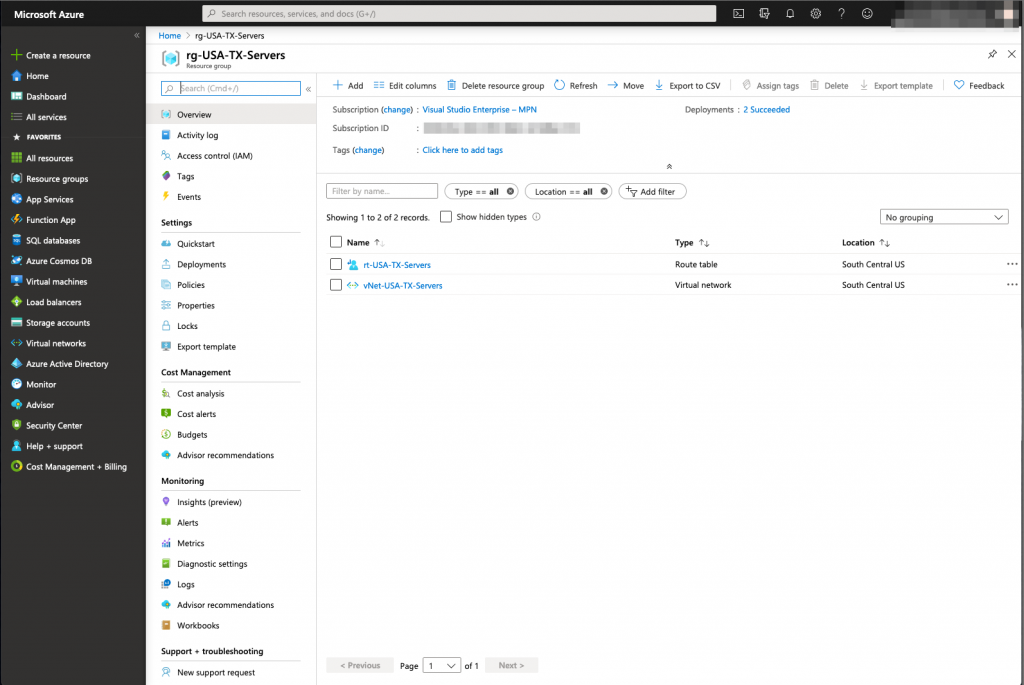
Azure Routing Table and vNet Peering
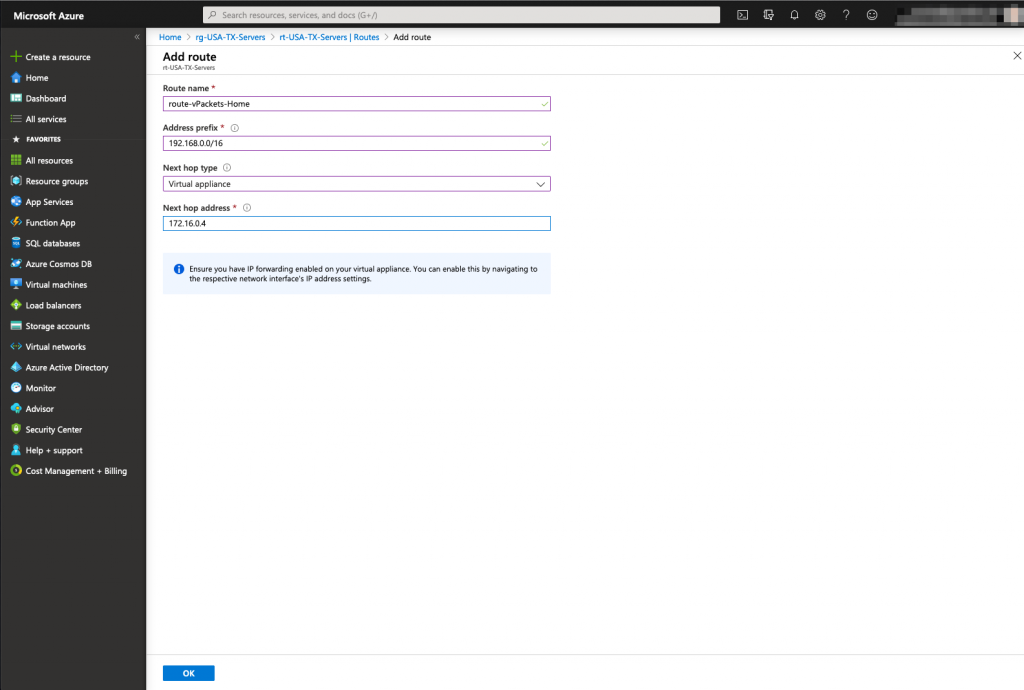
The last step is to create a route for the internal home network that will point to the single network interface of the vMX100 (in Cisco world, that would mean : ip route 192.168.0.0 255.255.0.0 172.16.0.4). A peering between both virtual network Azure Meraki Lan and Azure Servers is also mandatory to create the virtual communication between them
Route Table Creation
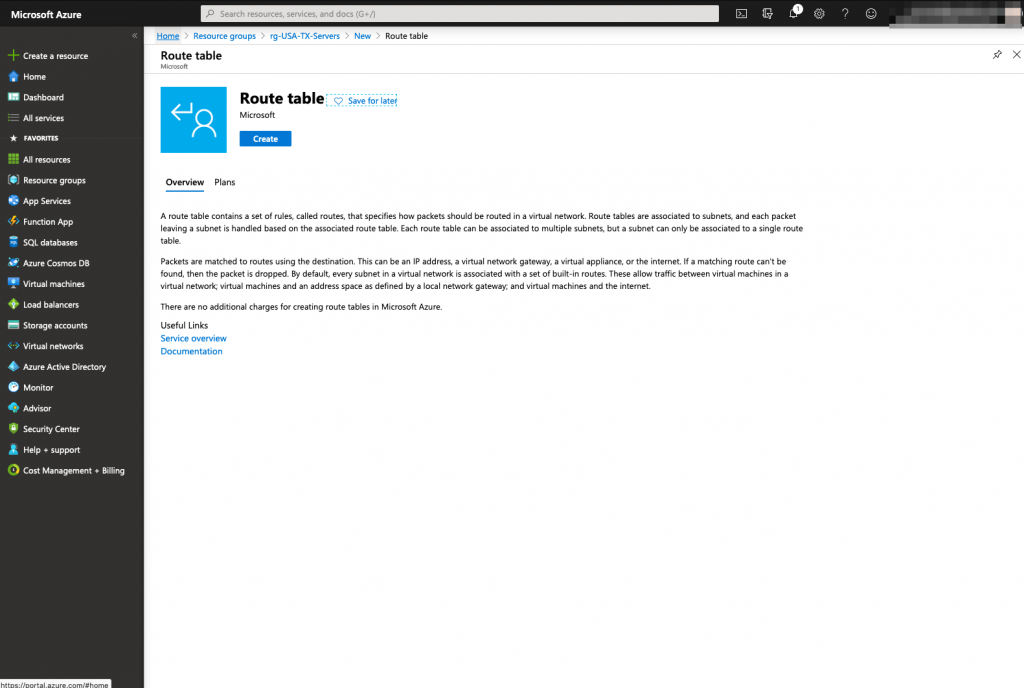
The route table must belong to the vNet previously created.

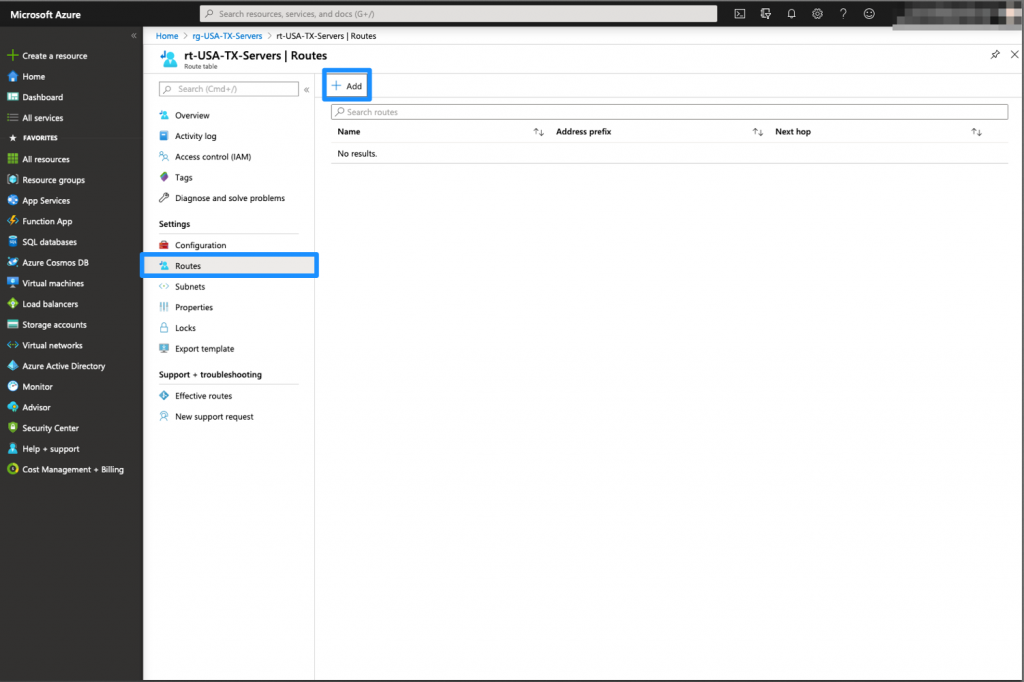
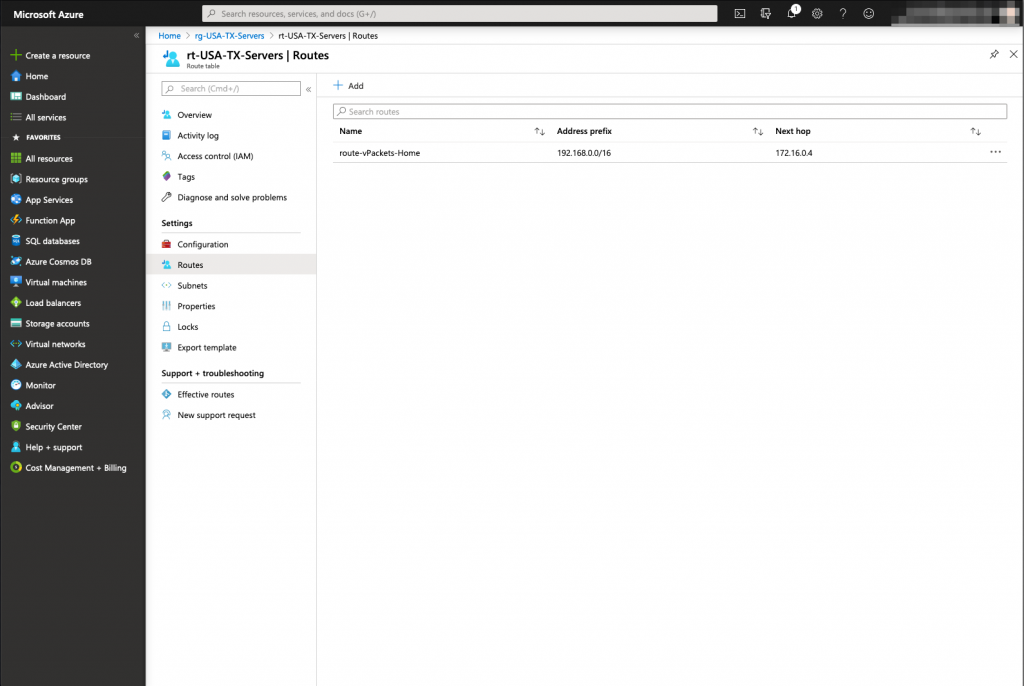
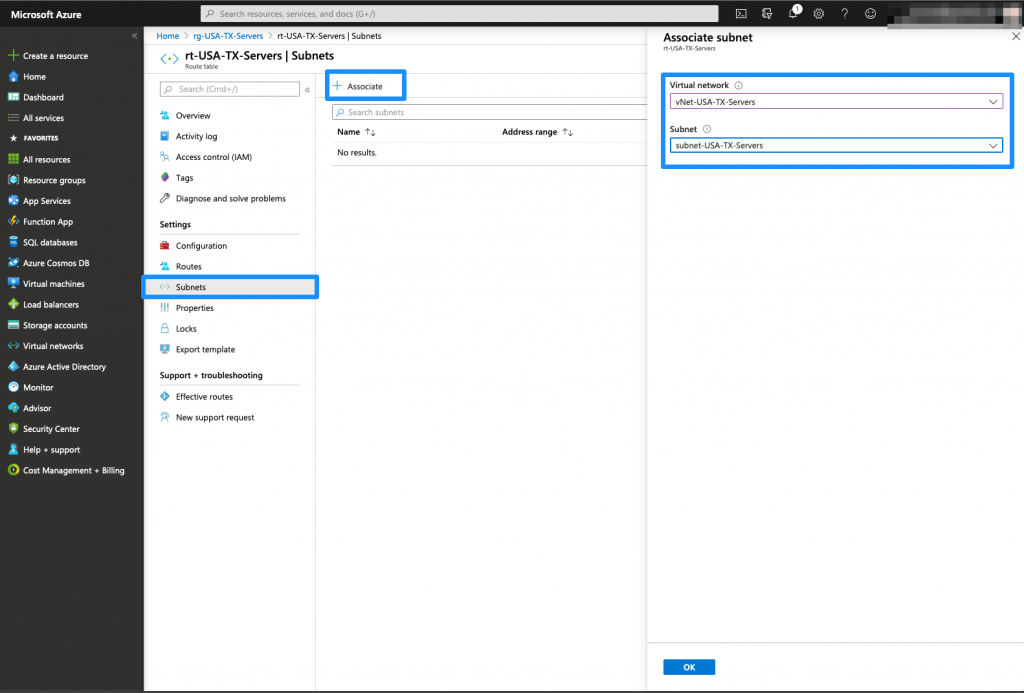
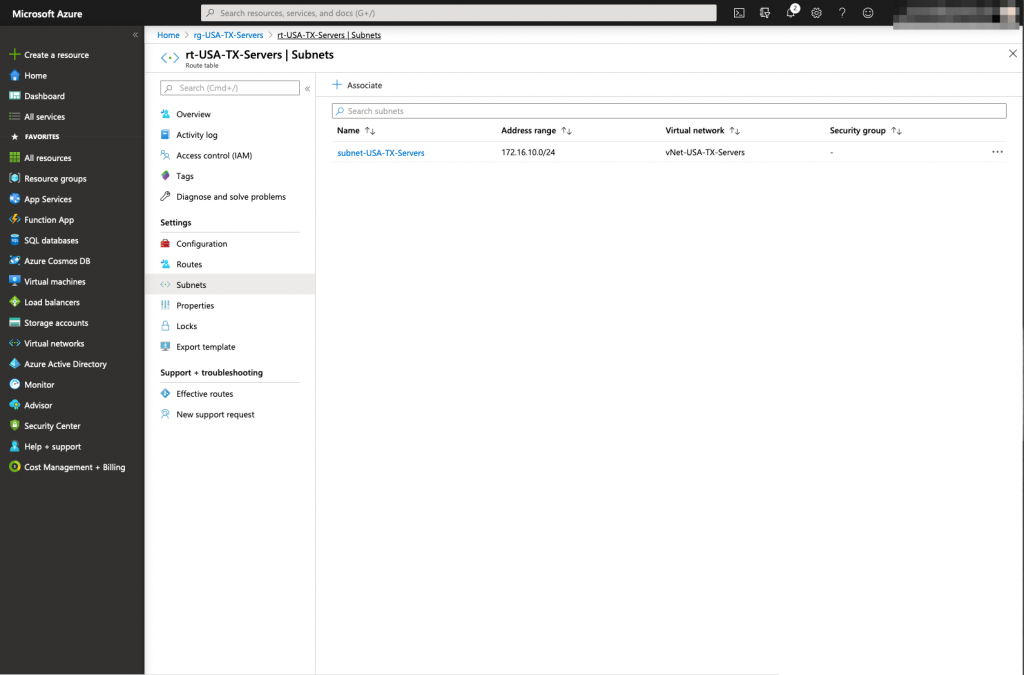
The Route table has been now created, we need to associate the accurate server subnets to that route table.
vNet Peering
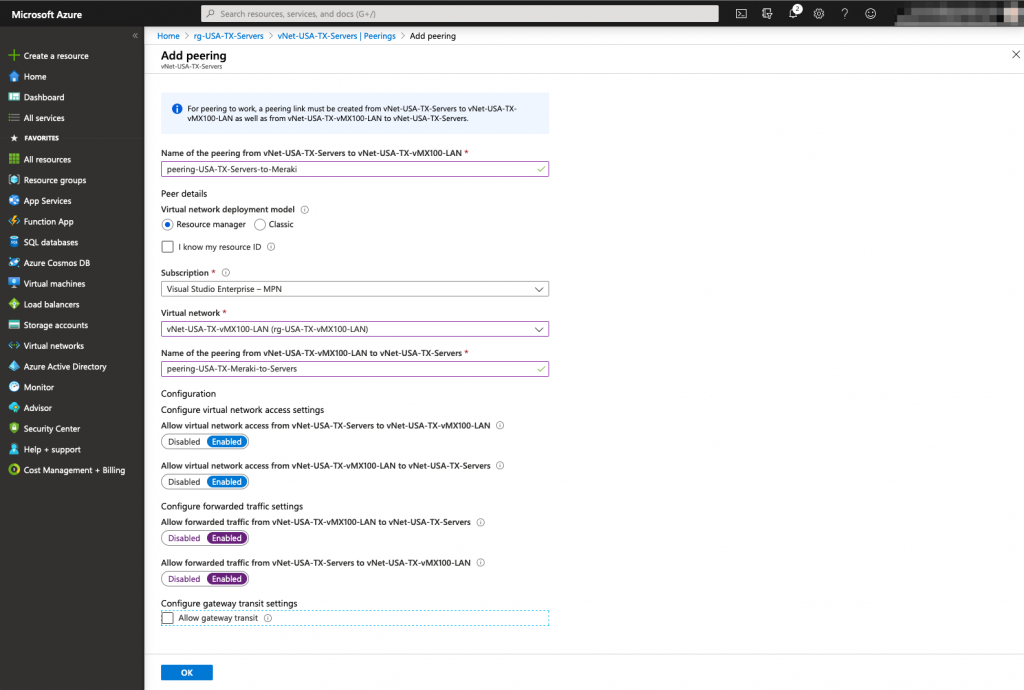
Finally, The last task that needs to be achieved in order to provide connectivity between Azure and your on premises network, is to create a peering between the 2 vNets previously created.
On the Azure GUI, you will be able to create two peering in a single task, one for each direction (Servers to Meraki LAN and Meraki LAN to Servers).
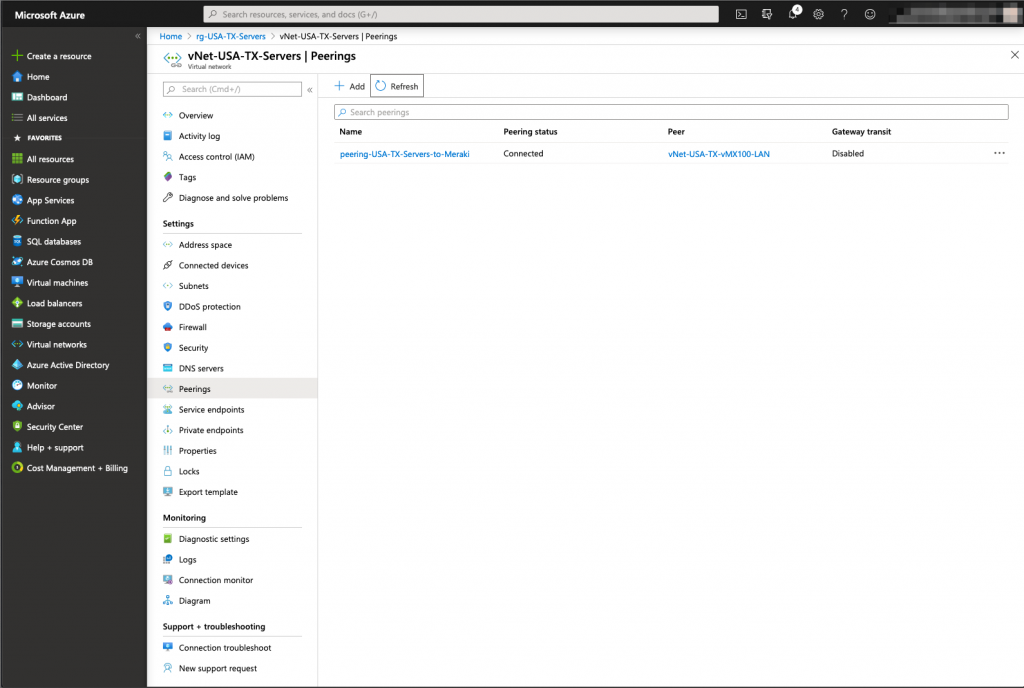
Verify that the Peerings are in the connected state
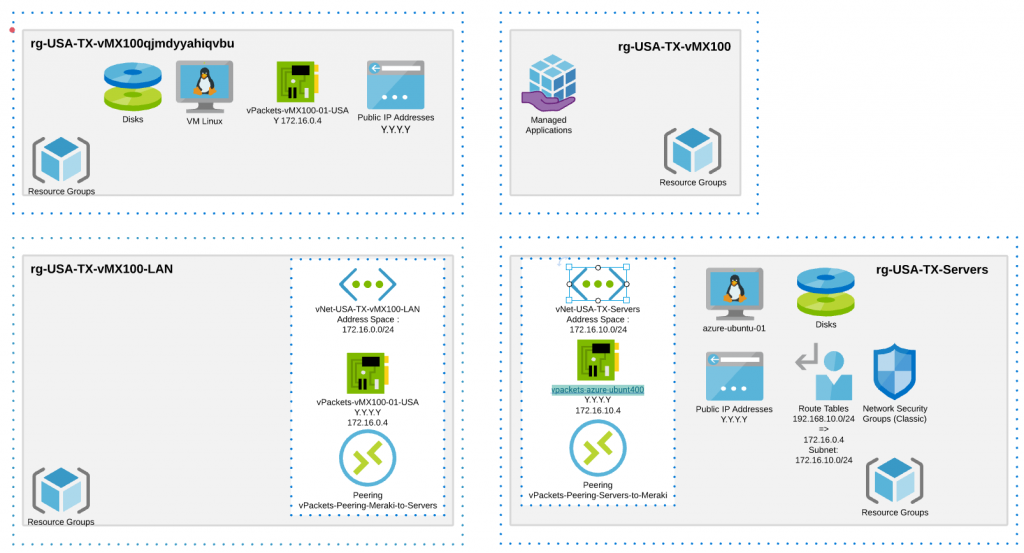
Final representation – Microsoft Azure Objects
Here is a reprensantation of the objects we have created in Azure so far:
Testing
Finally, we can test if we have the connectivity to Azure using a Virtual Private Network.

This was the manual way of interconnecting your Azure instances and your Home or Data Center workloads, it is definitely possible to automate it. Let me know what you think or if you have a question.